+1 (737) 299 19 19Call for free inspection
Home•Insulation•Attic Insulation Inspection

Free Attic Insulation
Inspection, Step by Step

More insulation does not automatically mean better insulation. We inspect the attic as a system, ventilation, material, installation, contamination, air gaps and real coverage, before we recommend adding a single inch.

Get a call back within the hour

Step 1 of 2. Just a number to reach you.

Enter a 10-digit phone number.

Almost done

Step 2 of 2. Helps us send the right technician.

Please add your name.
5-digit ZIP.

We call or text only about your request.

Got it. We'll call you shortly.
  1. A call from our dispatch within the hour, day or night.
  2. We agree a window, often today or tomorrow.
  3. Free inspection with photos, then a written quote.

Or call +1 (737) 299 19 19for free inspection

4.9
★★★★★71 reviews on Google

An insulation inspection is not a depth measurement. Anyone can blow another eight inches on top of what is there. If the layer underneath has gaps, compressed batts, blocked soffit vents or open penetrations into the house, the new material hides the problem and does not fix it. Your attic looks full and your bills do not move.

Why We Inspect
Before We Quote

So we check the attic the way it actually works: how air moves through it, what is already in it, what condition it is in, how deep it really is across the whole floor, how well it was installed, and where the house is leaking air into it. Eight steps, and one of four honest answers at the end: keep it, add to it, correct it first, or take it out.

The 8-Step
Attic Insulation Inspection

Every step below is part of the same free visit. Under each one: what we check, what can go wrong, and what we photograph so you can see it yourself.

1

Attic Airflow & Ventilation

First we check whether the attic is ventilated properly and whether air actually moves through the intended paths: soffit, ridge and any other attic vents. Where useful, a safe theatrical fog test shows the air movement and the dead zones.

What can go wrong

Soffit vents packed with insulation, a ridge vent that was never cut open, an attic that hits 140°F and cooks the ductwork inside it.

What we photograph

The attic overall, the ventilation points, and any blocked or problem areas.

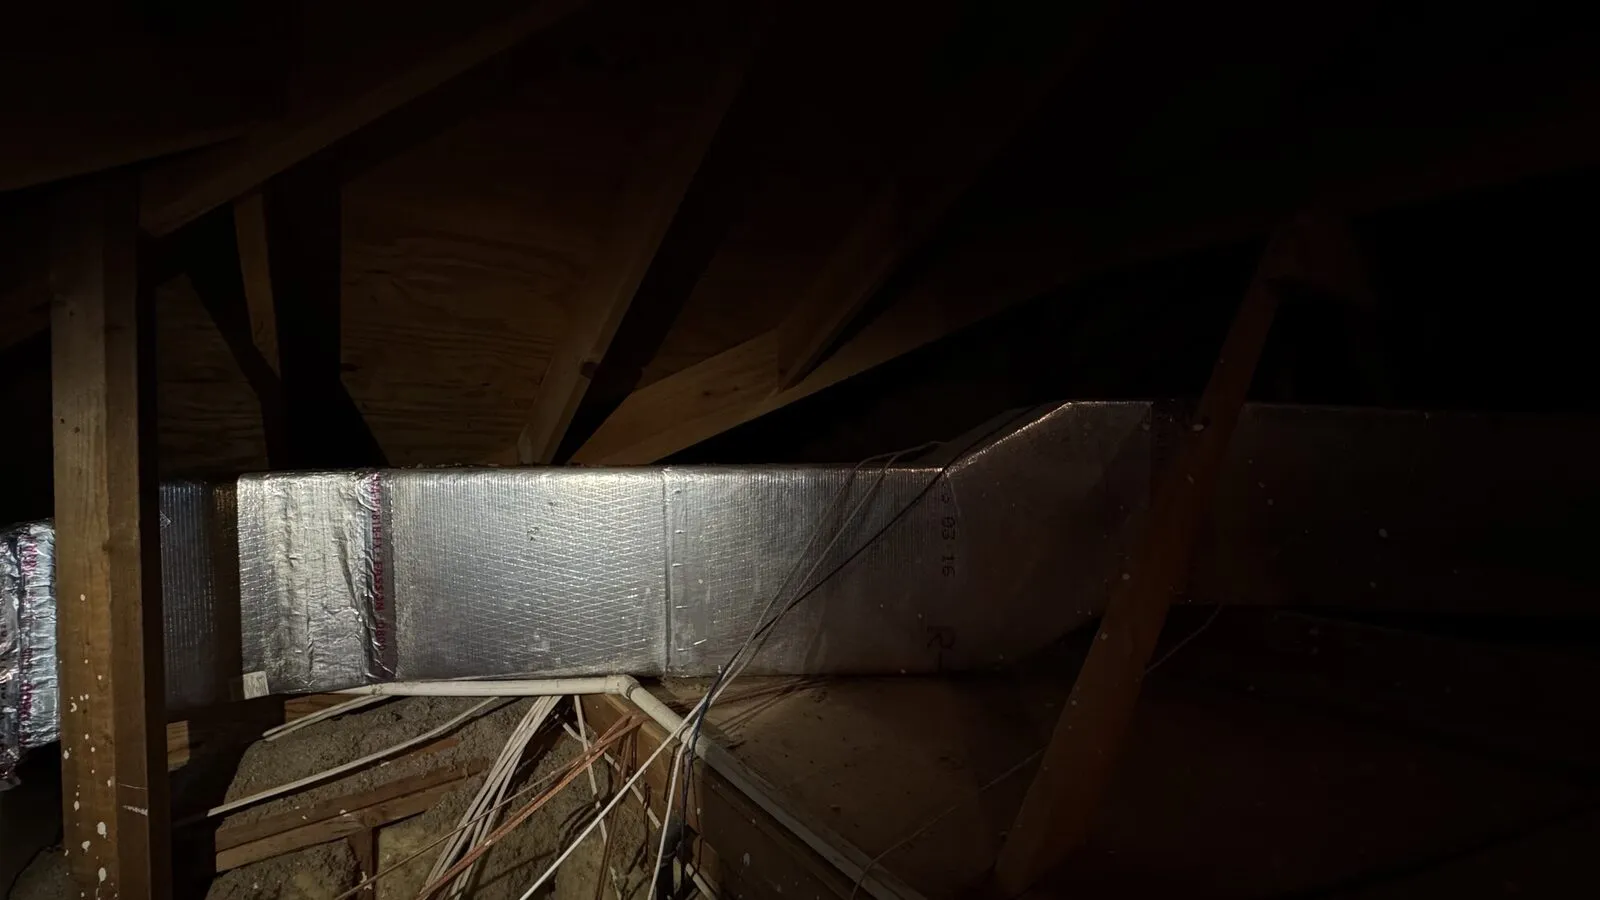
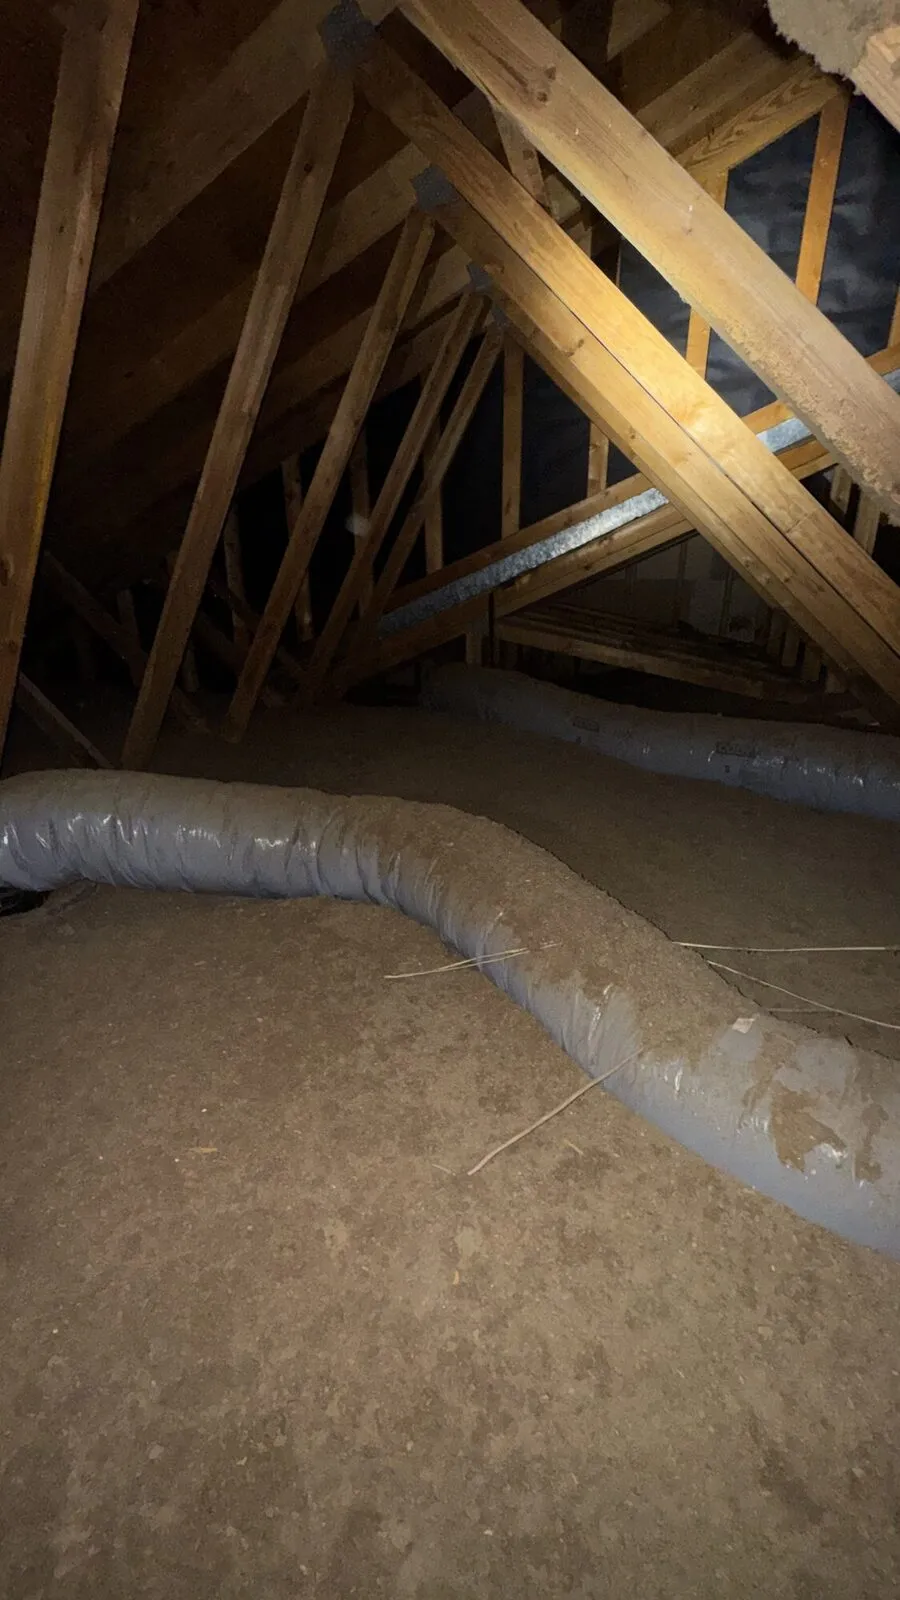
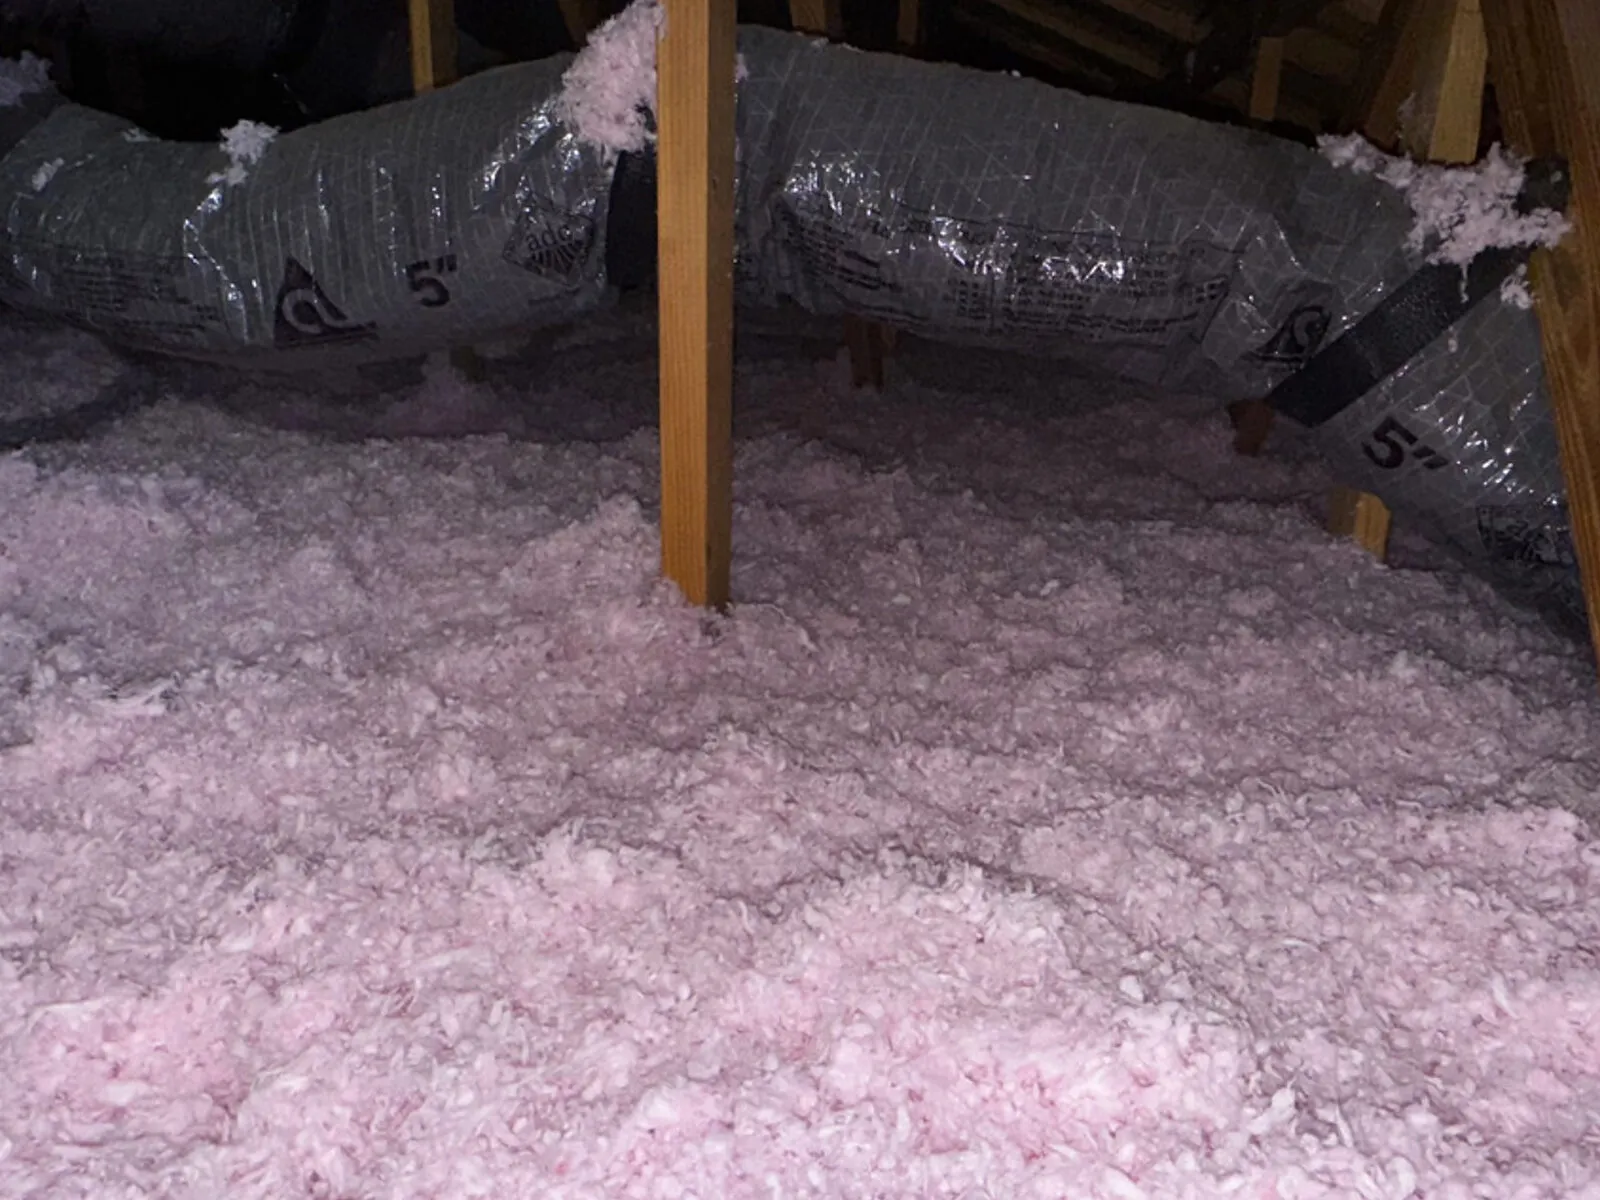
Attic overview: rafters, trunk line and the ventilation path along the eaves
2

Existing Insulation Identification

We identify what is already in the attic: fiberglass batts, blown fiberglass, cellulose, mineral or rock wool, or a combination. It matters especially how many different layers and types are stacked on each other.

What can go wrong

Three generations of material on top of each other, each installed around the last one and none of them continuous.

What we photograph

Each layer and material type we find.

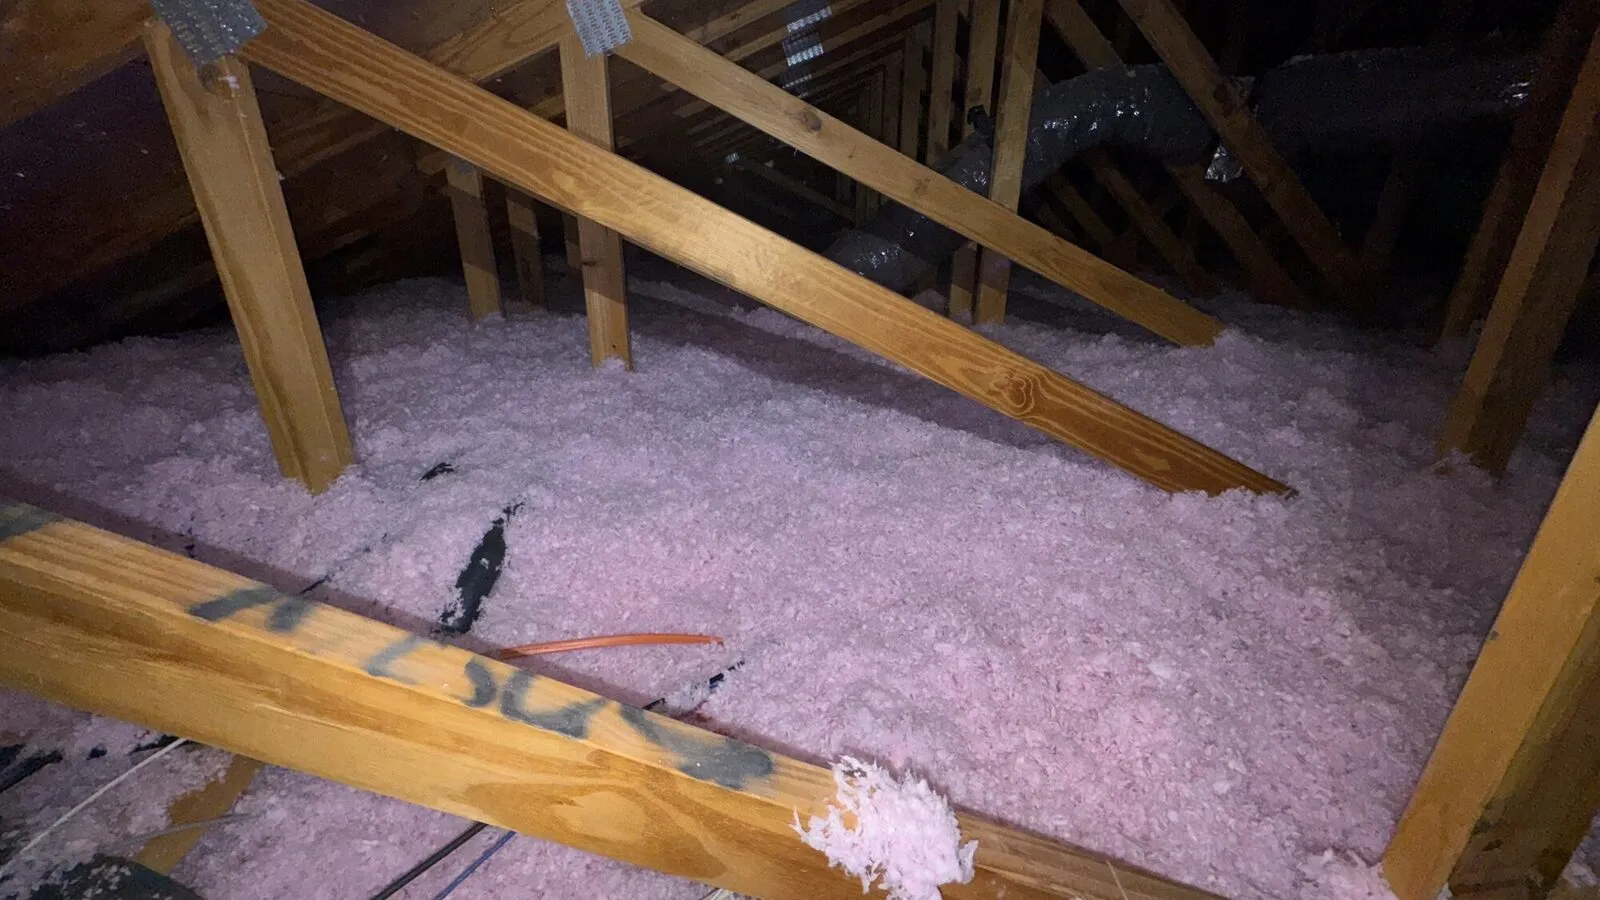
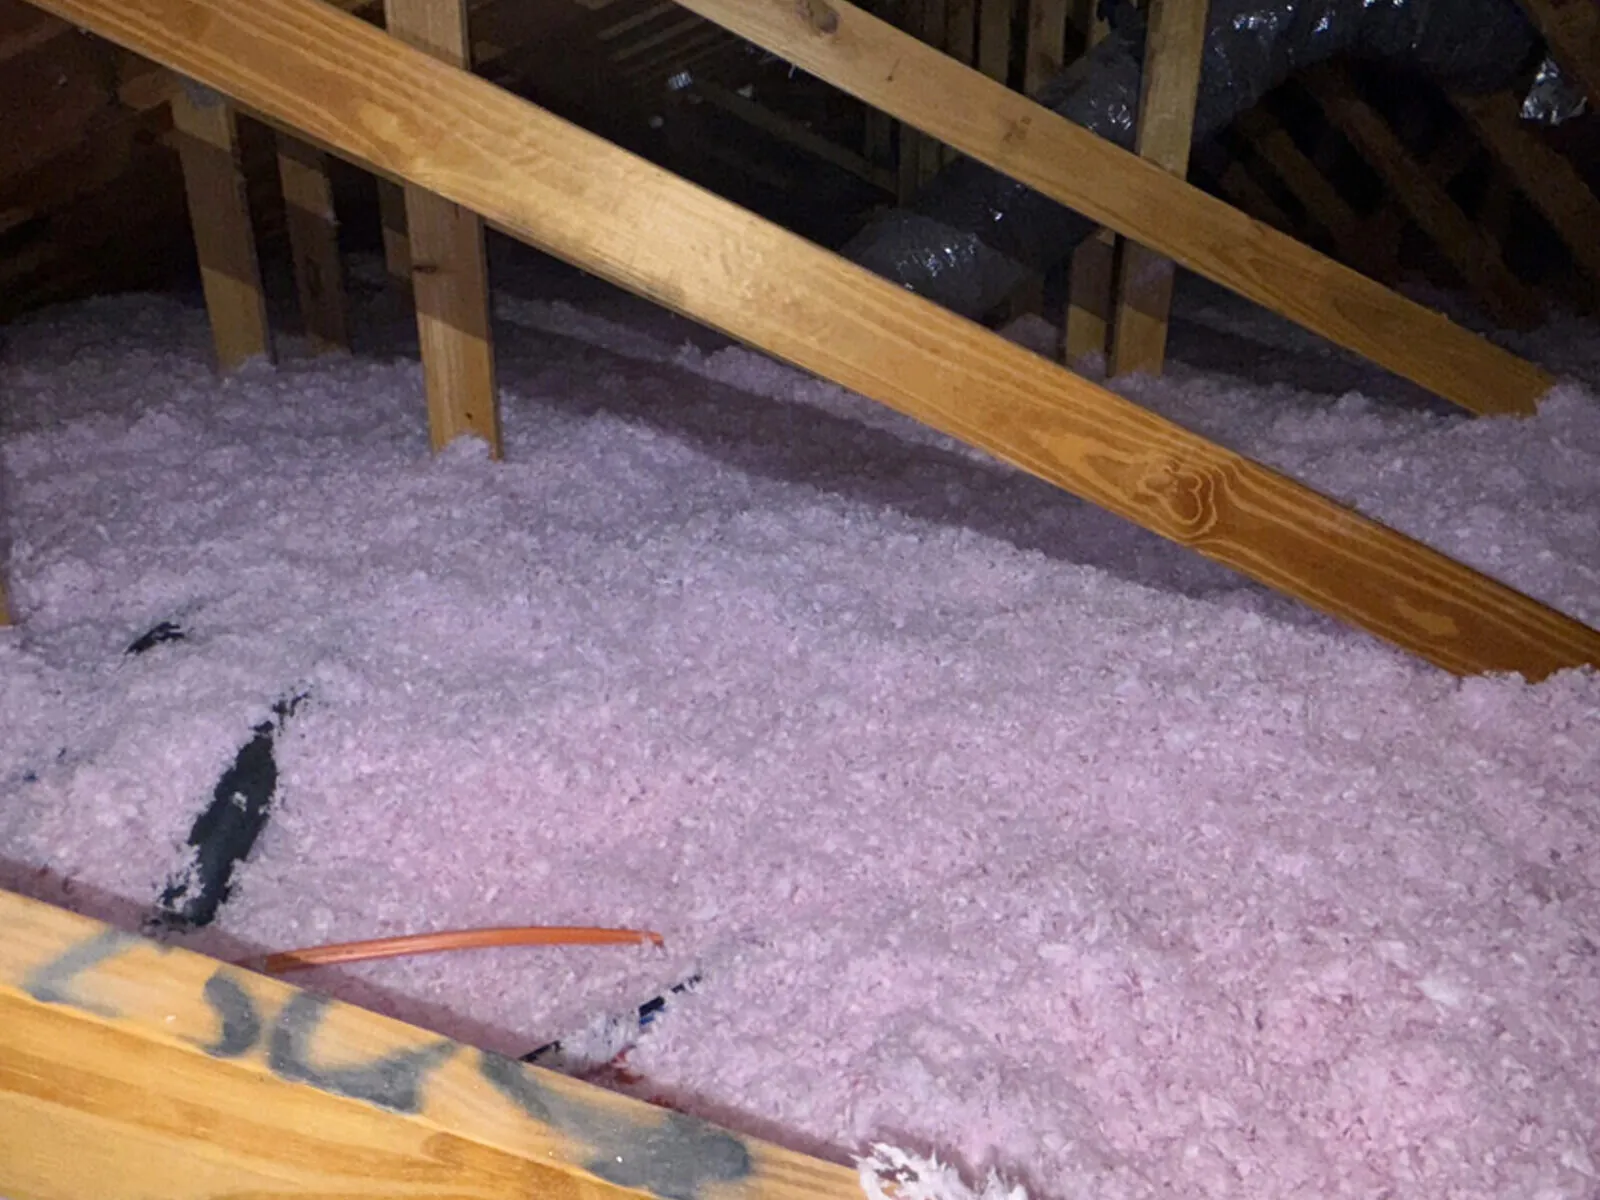
Blown fiberglass, one continuous layer across the joists
3

Insulation Condition

We check the physical condition: contamination, compaction, moisture damage, signs of pests, debris, discoloration and other deterioration. If a material looks suspicious we do not guess at what it is by eye; we recommend the right testing.

What can go wrong

Rodent droppings and tunnels, insulation that got wet from a roof or AC leak and never dried, dark patches where air has been filtering through it for years.

What we photograph

Every contaminated, damaged or suspect area.

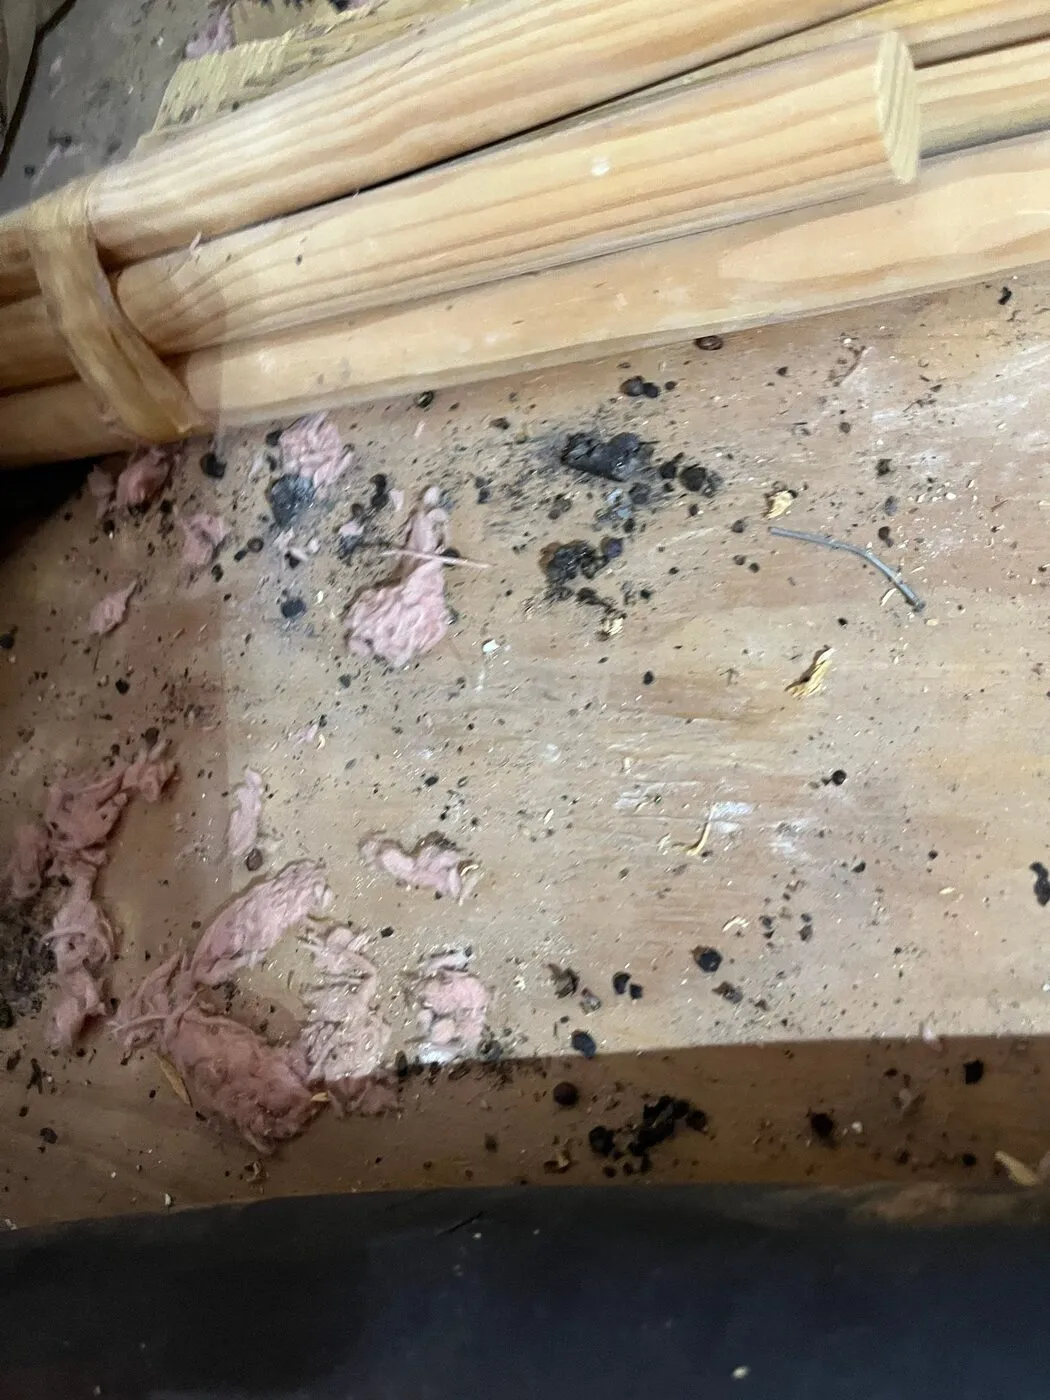
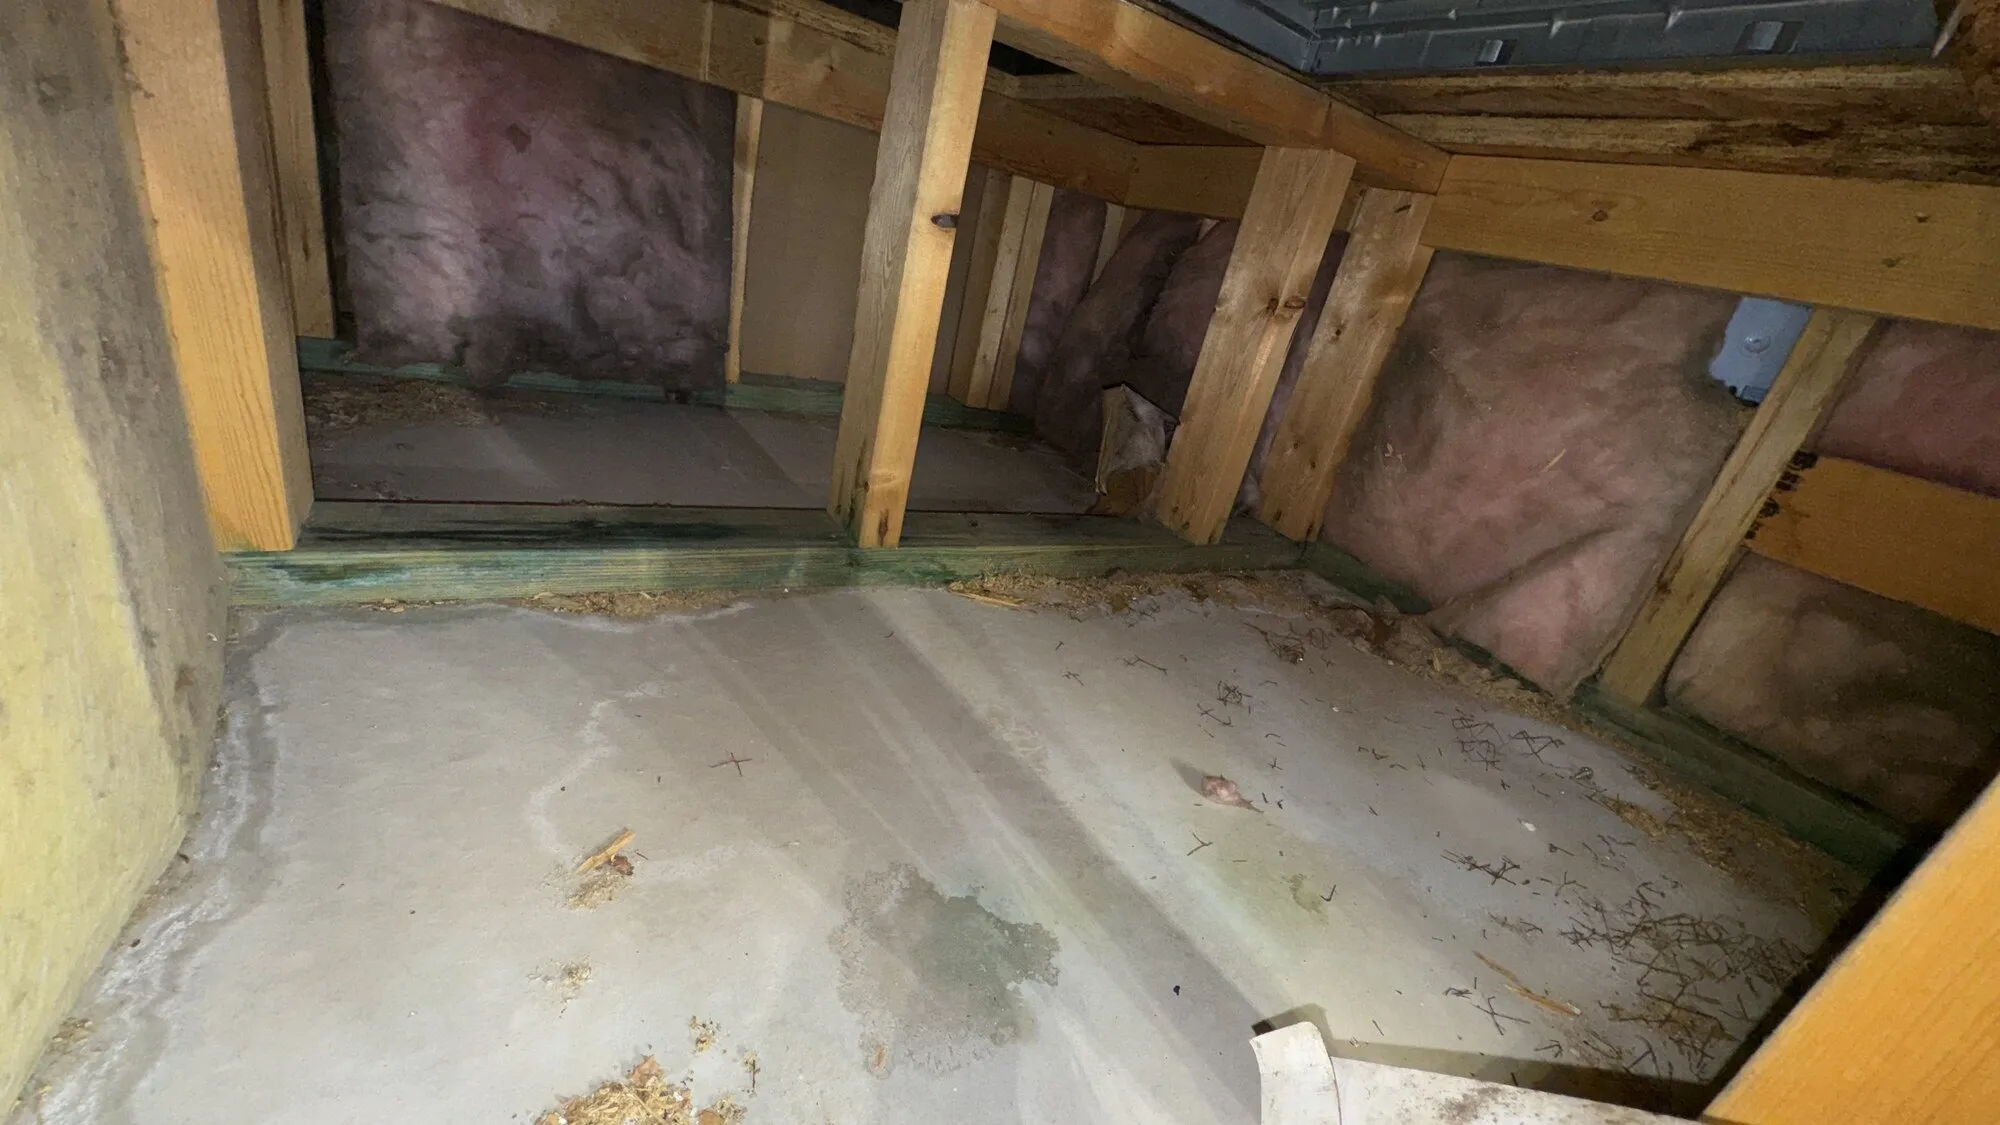
Old insulation with droppings and debris across the attic floor
4

Insulation Depth & Coverage

We measure the actual depth in several spots across the attic, not in one convenient place by the hatch. We also check whether the coverage is even: thin spots, completely bare areas, compressed insulation and material that was pushed around.

What can go wrong

Fourteen inches by the hatch and four inches over the bedrooms, bare decking where someone stored boxes, insulation flattened under duct runs.

What we photograph

The measurements with a measuring stick or tape, so you see the real depth.

Thin, settled insulation with bare decking showing between the joists
5

Air Gaps & Improper Installation

One of the most important steps. We check whether the previous installation was done right. Under new blown-in there may be old batts or rock wool with gaps, compressed sections or missing coverage. New material on top looks thick, but it does not fix the layer underneath or the air leaking through it.

What can go wrong

Batts cut short of the joist, insulation laid on top of wiring with a void under it, the previous crew blowing over everything without lifting a batt.

What we photograph

Gaps, exposed areas, badly fitted batts, mixed layers and other installation defects.

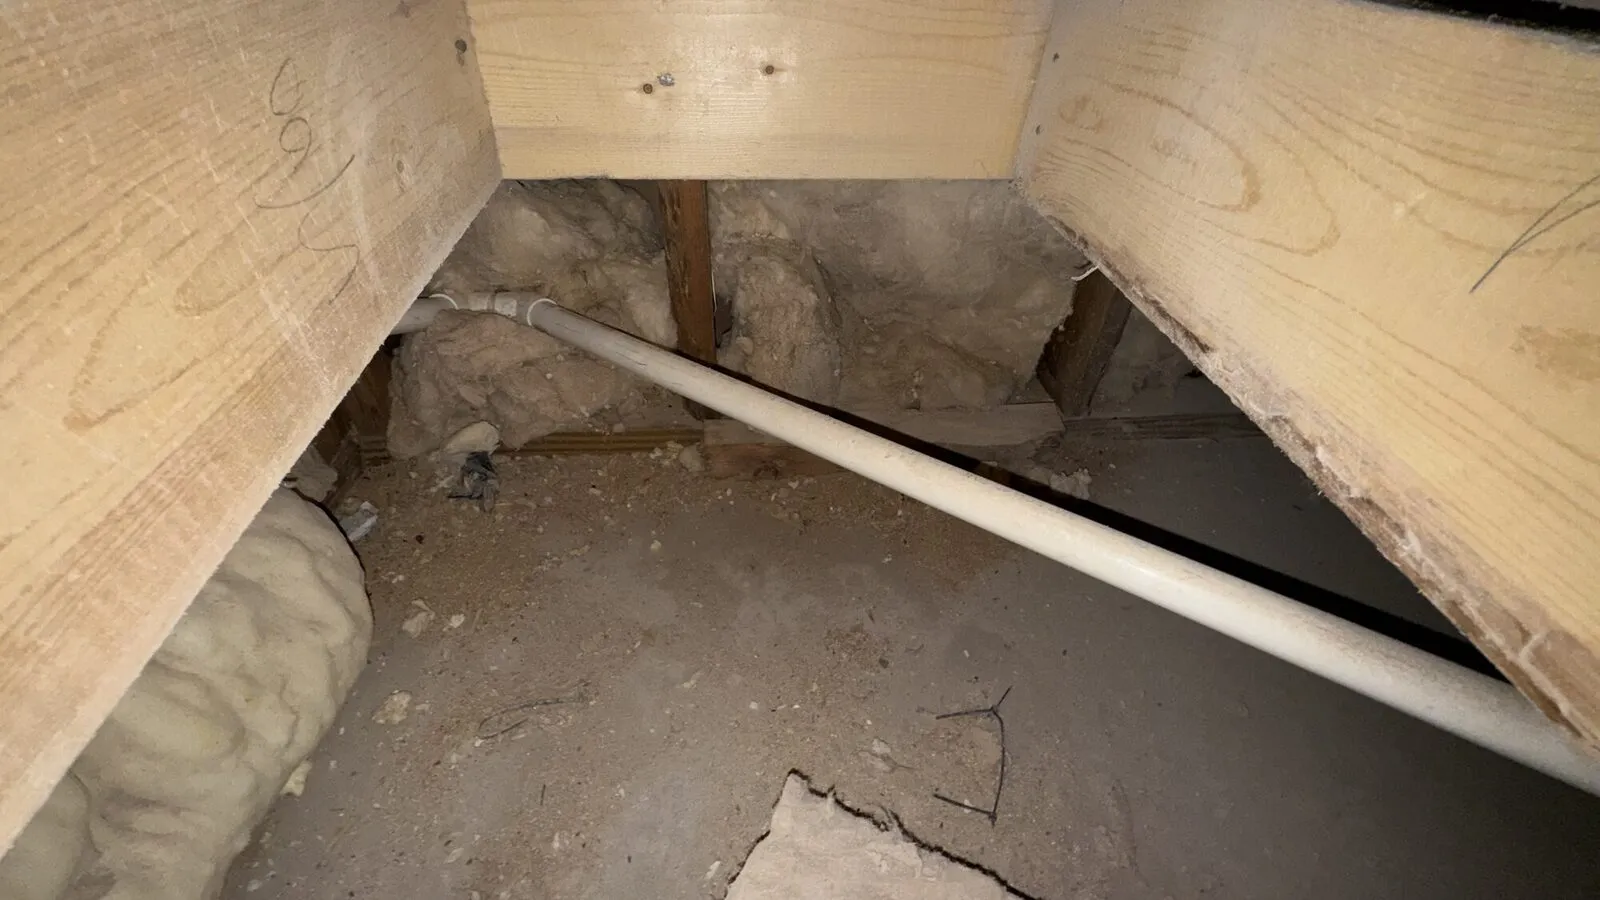
Old batts with a gap along the joist and a pipe run through the void
6

Attic Air-Sealing Conditions

We check accessible penetrations and possible air paths between the living space and the attic: plumbing and electrical penetrations, openings, the attic access and other visible gaps. This is the core of it: more insulation is not always the answer. If the air leakage and the bad original installation stay, adding a lot of blown insulation may not fix the problem.

What can go wrong

Open holes around pipes and wires, a chase from the kitchen that runs straight to the attic, an attic hatch with no weatherstrip and no insulation on it.

What we photograph

Every air gap and penetration we find.

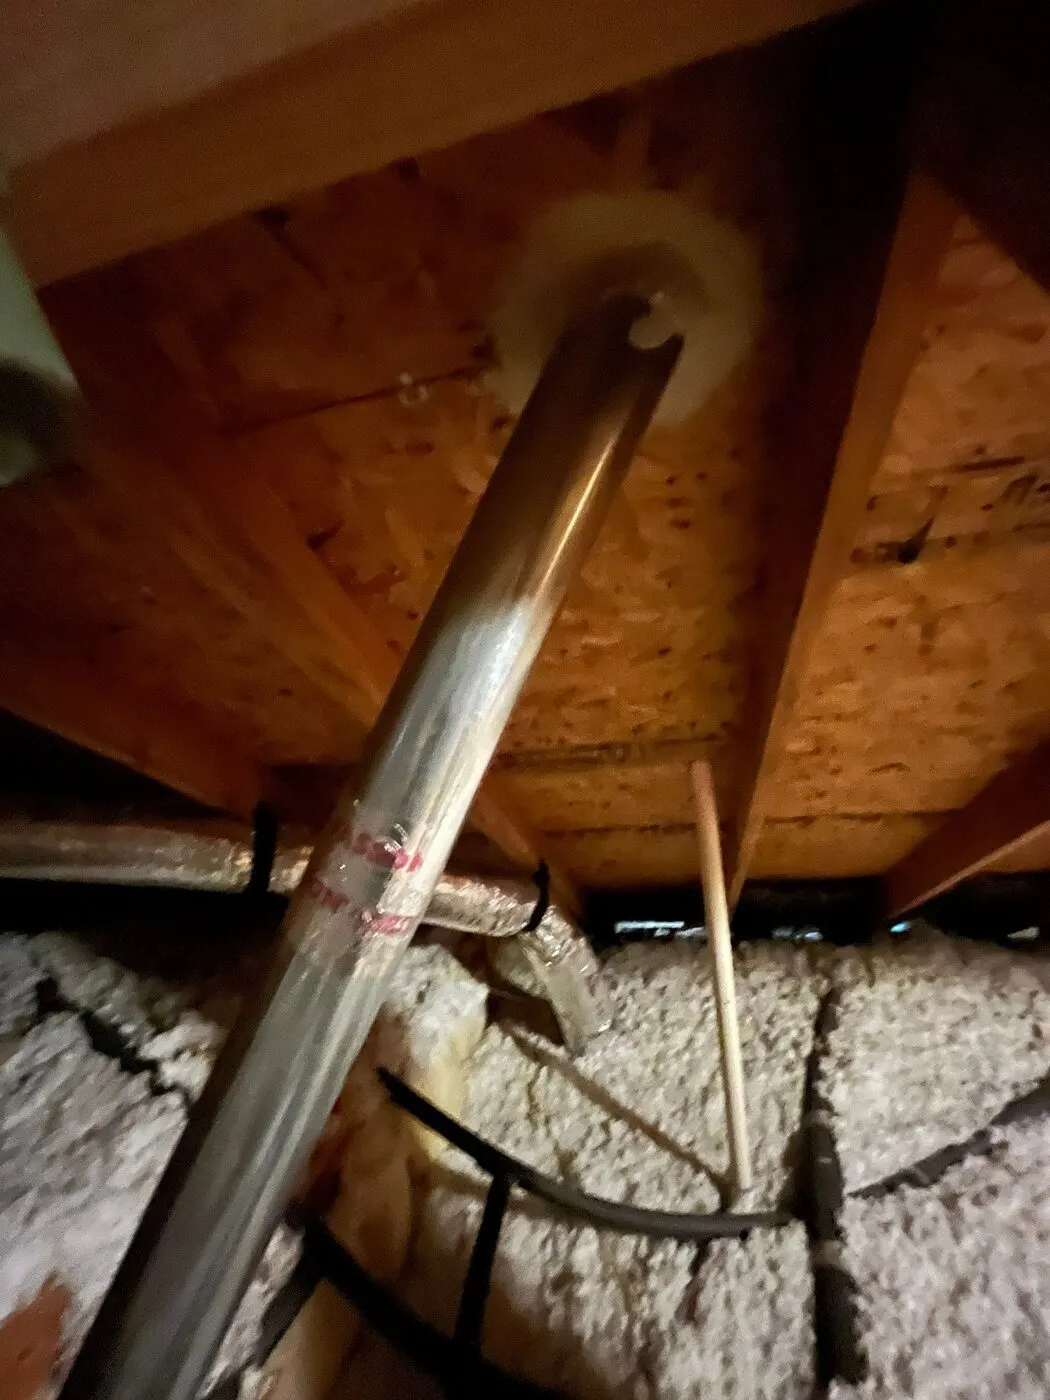
Penetration through the top plate into the attic, one of the air paths we check
7

Roof & Ventilation Path

We check the roof and attic ventilation path, including accessible ridge vents, soffit intake areas and baffles. Insulation must not block the ventilation paths it depends on.

What can go wrong

Baffles missing at the eaves, so the first blow-in job sealed the soffits; a roof vent that was capped by a roofer and never reopened.

What we photograph

Ridge and soffit ventilation, the baffles, and any blocked zones.

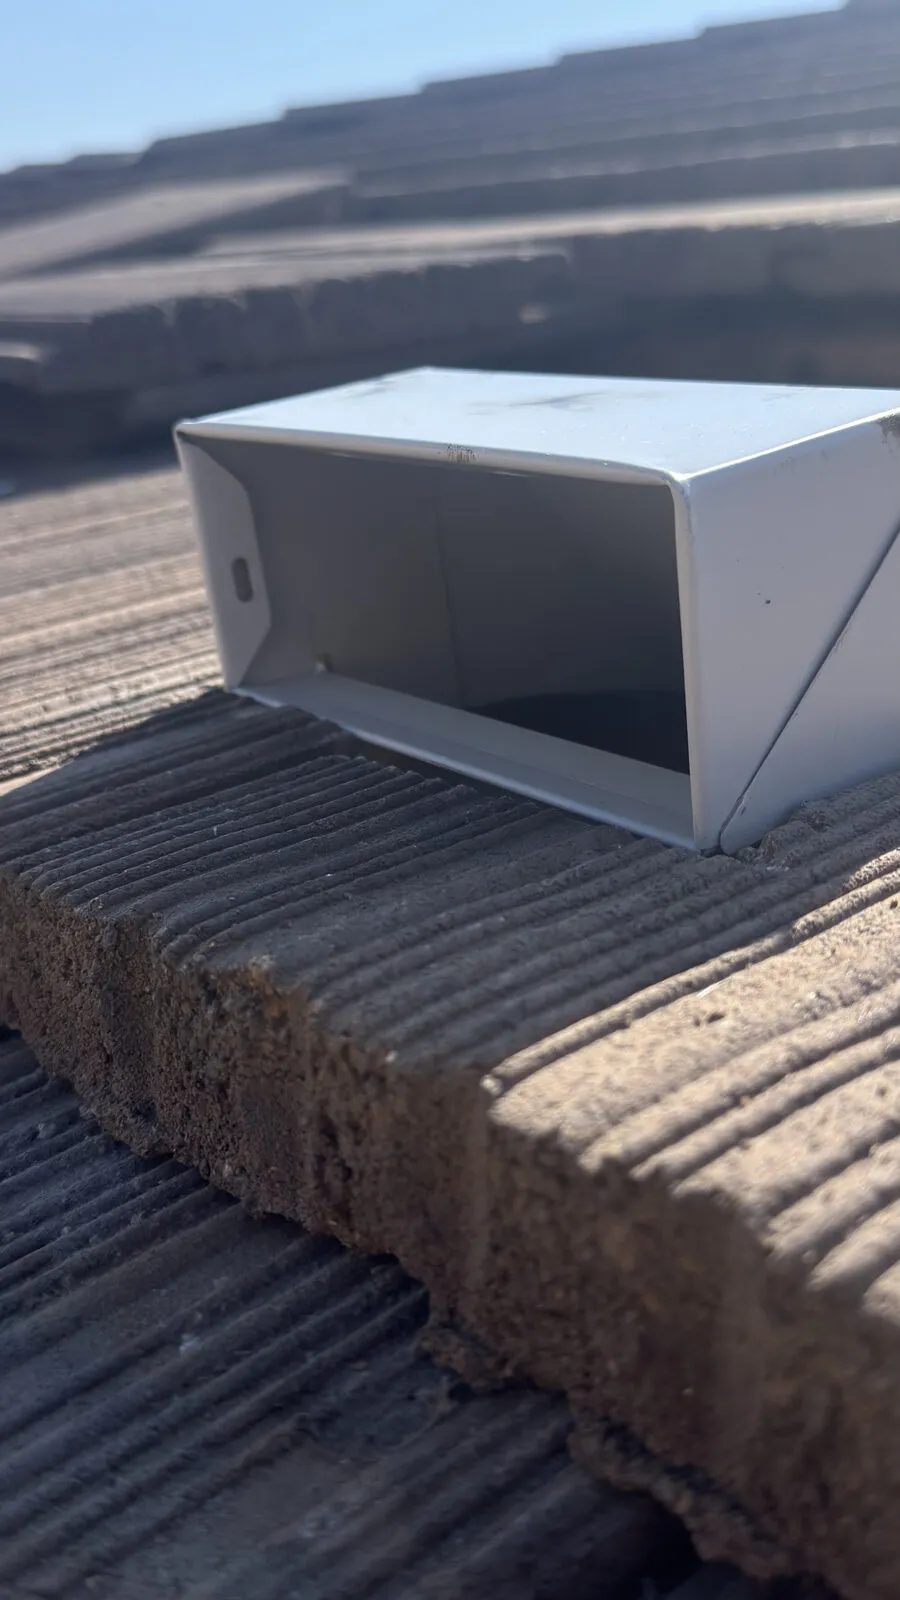
Roof ventilation box: one of the exhaust points we verify from above
8

Final Recommendation: Keep, Add, Correct or Replace

After the full inspection the technician gives you one of four answers: the existing insulation is in acceptable condition; additional insulation is needed; air sealing or the installation has to be corrected first; or the condition of the material and the system justifies removal and replacement.

What can go wrong

The one answer you will not get is "just add more" without the seven steps above behind it.

What we photograph

The photos and measurements that support whichever answer you get.

New blown-in fiberglass at full depth after removal and air sealing

Our rule for every technician: No recommendation without documentation. If we recommend cleaning, repair, sealing or replacement, you see the photo that explains why.

What You Get
After the Inspection

One of four answers, with the evidence: keep, add, correct first, or remove and replace. If we recommend removal, replacement, additional insulation or air sealing, the report has the photos and the measurements that show why. That makes the recommendation convincing, and it protects you from being told "you need to replace your insulation" with no proof.

Where the Inspection
Can Lead

If the inspection finds something, these are the services it points to. If it finds nothing, you keep the photos and we leave.

Attic Insulation

Attic Insulation

A full 14 inches, level, with the ceiling sealed underneath. The biggest single lever on a Hill Country summer electric bill.

Insulation Removal & Replacement

Insulation Removal & Replacement

Old, wet or rodent-damaged insulation out, deck cleaned and sealed, then a full 14 inches of new blown-in. One day, photos before and after.

Found on Inspection,
Fixed the Same Week

Real attic insulation findings from Central Texas homes, before and after.

BeforeAfter
BeforeAfter
Service
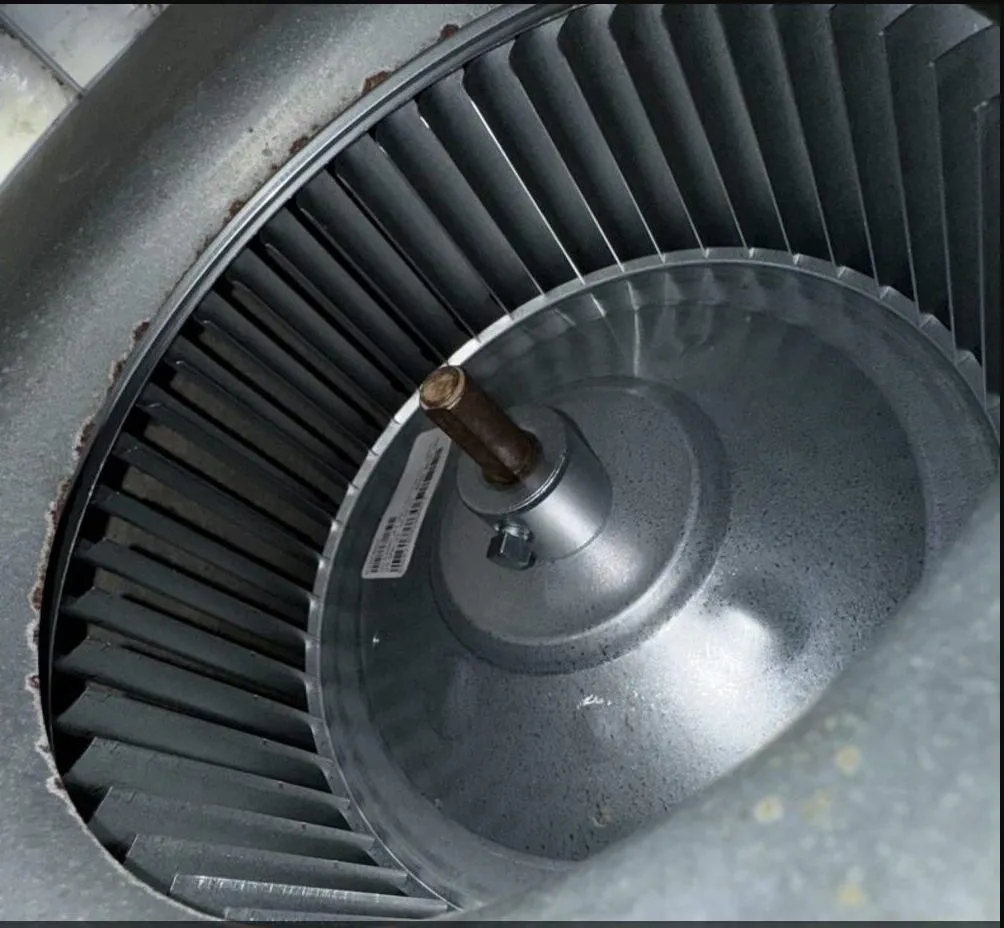
Blower wheel cleaning
Location
Georgetown
What We Found
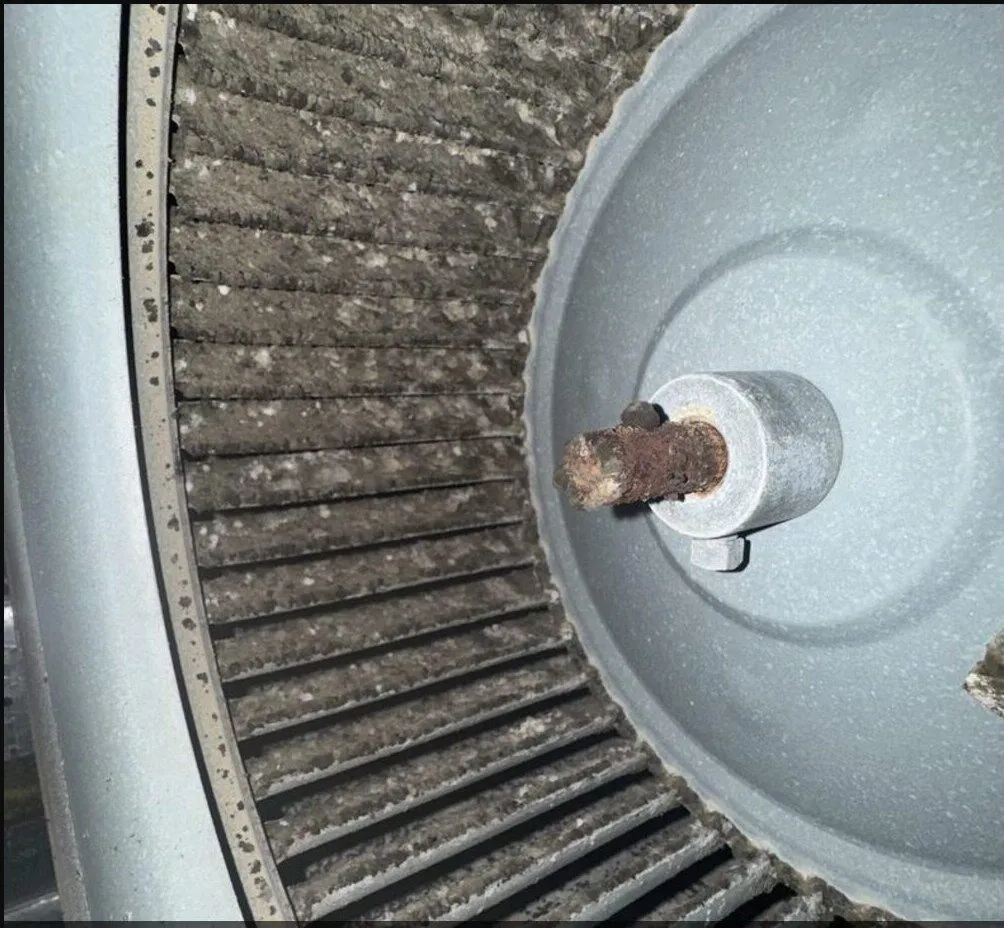
Blower wheel caked with dust, the same film that sat on the coil and caused the musty smell.
What We Did
Pulled and cleaned the wheel and housing, cleaned the coil, checked airflow after reassembly.
BeforeAfter
BeforeAfter
Service
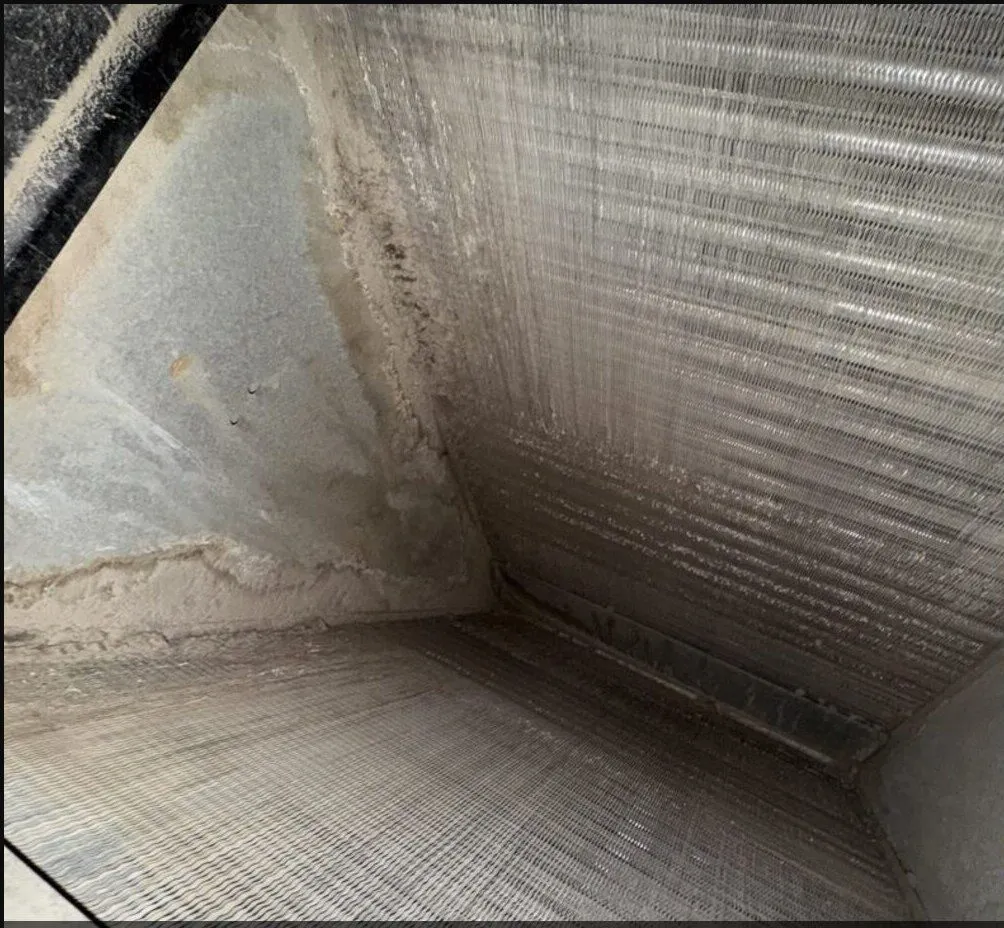
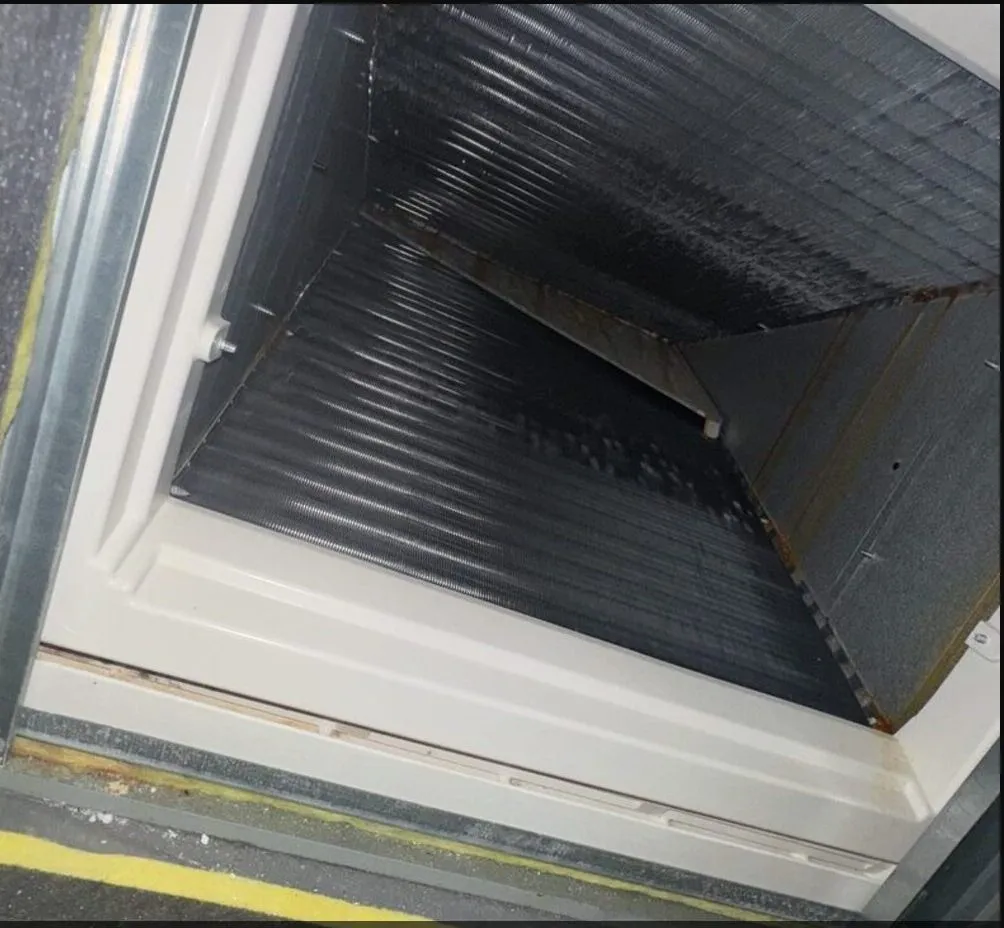
Evaporator coil cleaning
Location
Leander
What We Found
Coil fins clogged with debris; the AC ran all day and never caught up.
What We Did
Cleaned the coil front and back with the panel off, cleared the drain line.
BeforeAfter
BeforeAfter
Service
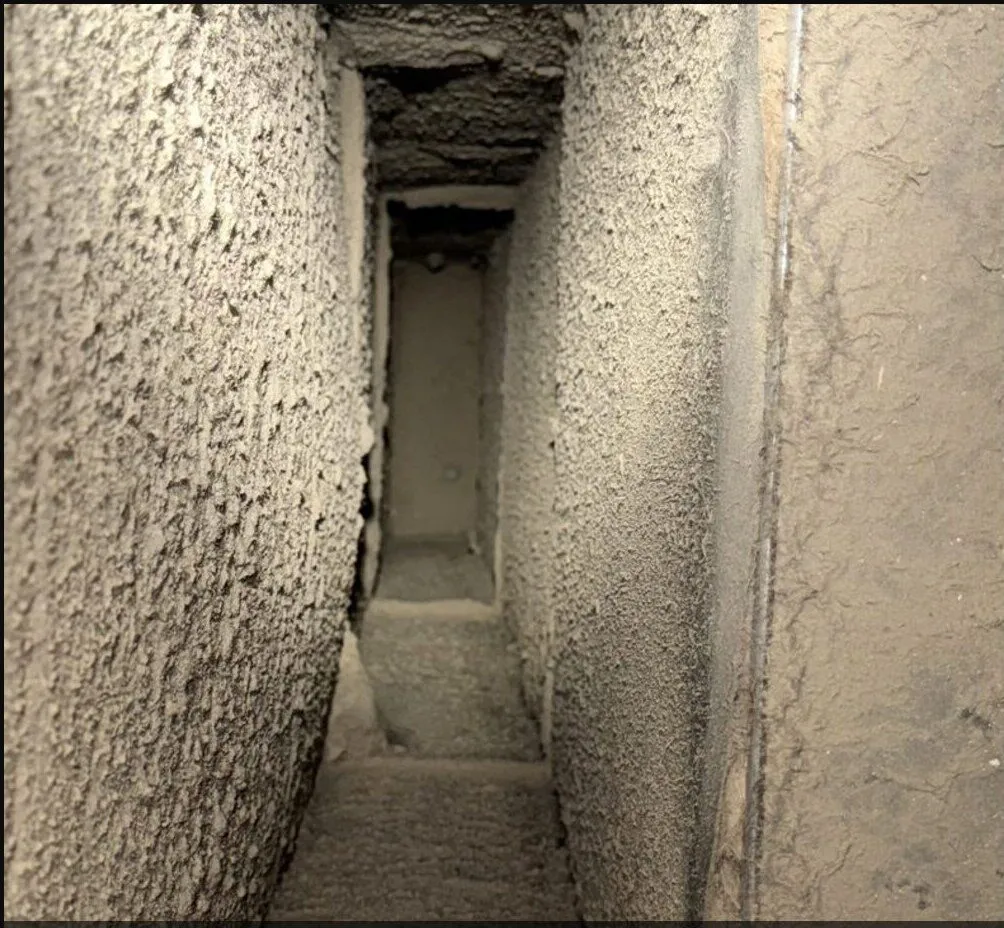
Air duct cleaning
Location
Marble Falls
What We Found
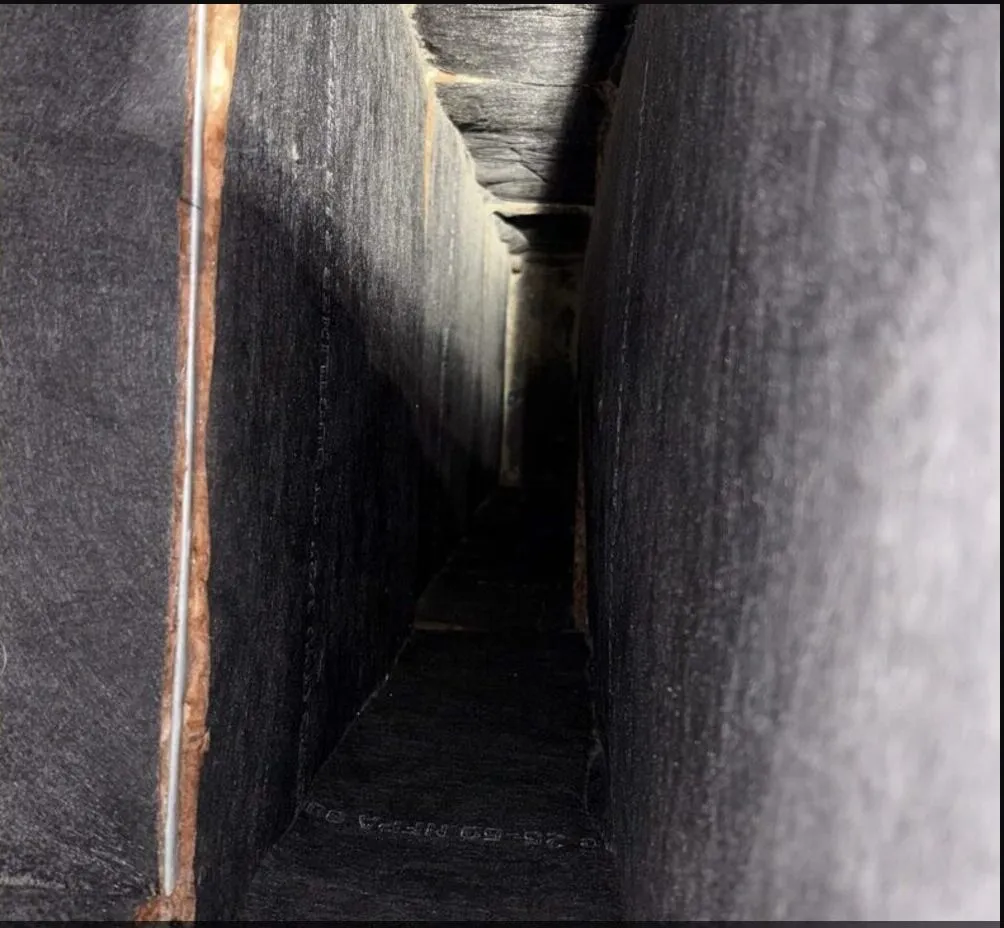
Supply trunk line packed with dust well past the register.
What We Did
Negative-air cleaning of the trunk and branches, registers cleaned and reinstalled.
BeforeAfter
BeforeAfter
Service
Return plenum rebuild
Location
Lakeway
What We Found
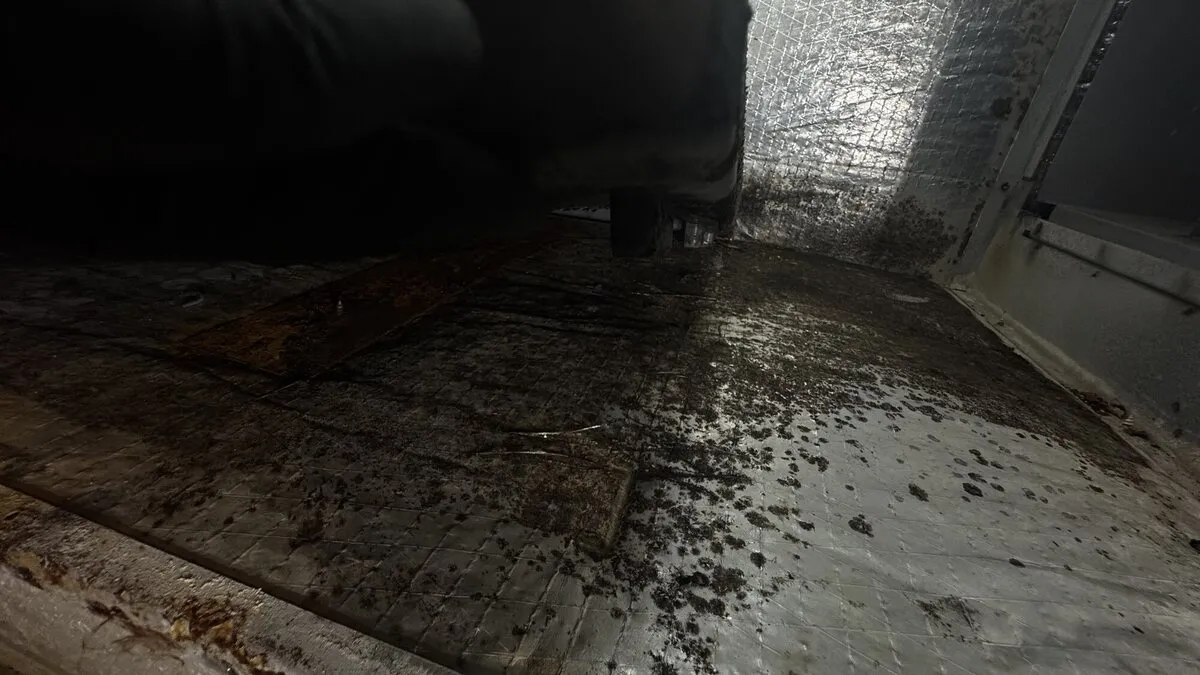
Original attic return plenum with stained, damp insulation lining.
What We Did
Rebuilt and sealed the plenum, new lining, connected to the existing system.

What Central Texas
Homeowners Say

Read what local homeowners say about the inspection and the work that followed.

Google Reviews
4.9 ★★★★★(71)
Review us on Google
★★★★★

They came to do the full inspection of our HVAC system and performed a thorough inspection with photos and a very detailed list of quoted recommendations. Gary and team were punctual the 3 times they came to our home and their price was very reasonable.

Read on Google
S
Salvador Vélez
a month ago on Google
★★★★★

Noah took the time to show us photos from inside the vents and ductwork and clearly explained the level of cleaning needed and why. We really appreciated the transparency and education instead of feeling pressured.

Read on Google
C
Casey Short
4 months ago on Google
★★★★★

Gary and the team completely overhauled and replaced all ducts, return boxes, drains, etc. for both of our HVAC systems. Timely, professional, prepared, friendly and completed the large job in record time.

Read on Google
L
Leslie Ritter
2 months ago on Google
★★★★★

Gary inspected the plenum, there was microbial growth in the insulation. The system was replaced 3 years ago but had the original 20 year old plenum. Gary replaced the plenum and installed a scrubber. We haven't had any allergy problems in our new home so far.

Read on Google
E
Eric Hall
2 months ago on Google

Free Attic Insulation Inspection
Across Central Texas

Air Duct Busters inspects attic insulation systems for homeowners throughout Central Texas, including Marble Falls, Horseshoe Bay, Burnet, Georgetown, Leander and surrounding communities.

Get a call back within the hour

Step 1 of 2. Just a number to reach you.

Enter a 10-digit phone number.

Almost done

Step 2 of 2. Helps us send the right technician.

Please add your name.
5-digit ZIP.

We call or text only about your request.

Got it. We'll call you shortly.
  1. A call from our dispatch within the hour, day or night.
  2. We agree a window, often today or tomorrow.
  3. Free inspection with photos, then a written quote.

Read Before
You Book

Short reads from the crew: what we find in Hill Country homes, what it costs, and what to do about it.

Frequently Asked
Questions About the
Attic Insulation Inspection

Is the attic inspection really free?

Yes, within our service area. About 30 to 45 minutes in the attic, photos and measurements sent to your phone, written price for anything we recommend. No obligation.

Why not just tell me the R-value I need?

Because R-value assumes the insulation is continuous, dry, uncompressed and sitting on an air-sealed ceiling. Most Hill Country attics we open fail at least one of those. Fixing that first is cheaper than burying it.

Do I have to remove the old insulation?

Not always. Clean, dry, simply thin: we top it up. Wet, contaminated by rodents, or compressed and full of gaps: it comes out, otherwise the new layer just traps the problem.

What is the fog test?

A theatrical fog machine in the attic with the house at normal pressure. The fog shows where air actually moves: through the soffits, or through the can lights into your bedroom. It is safe, it clears in minutes, and it beats guessing.

Can you inspect the ducts while you are up there?

We do it by default. The duct connections and the return box live in the same attic, and it is the cheapest time to find a leak.

Is it disruptive?

You will see a ladder at the attic hatch and a technician with a light and a tape. That is all.

Book Your Free
Attic Insulation Inspection

Leave a number and we call back within the hour to set a window. Photos at every step, written price before any work.

+1 (737) 299 19 19
Call for free inspection
Book online
Call nowFree inspection